Modified TopsCNC from Germany 🇬🇧
Hallo
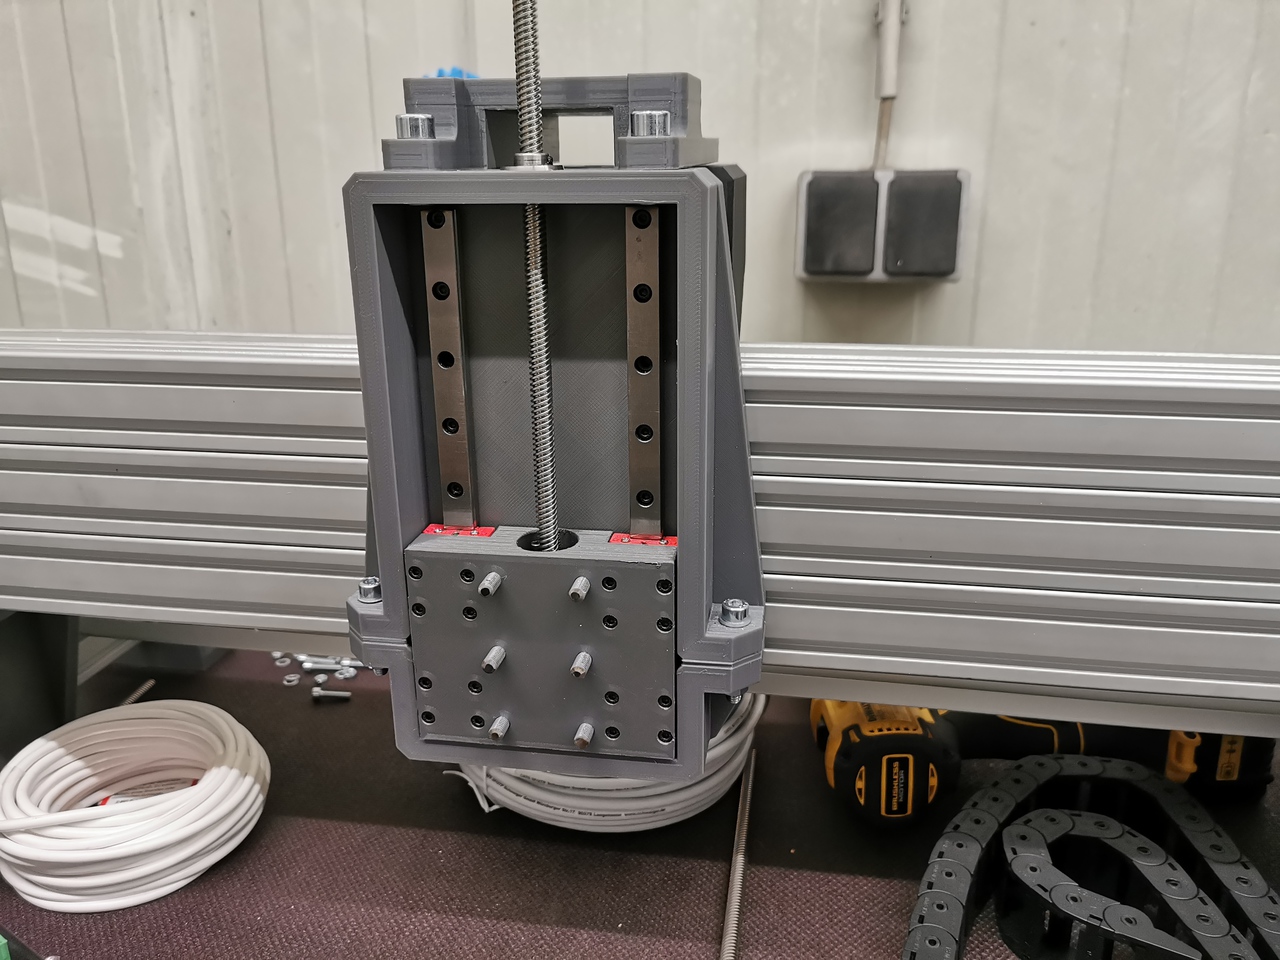
Ich habe eine Version TopsCNC Heavy 23 mit einem linearen Glet-Lager hergestellt. Bessere Steifigkeit, höhere Genauigkeit. Ich benutze eine 1,5 kW Vierkantspindel mit Luftkühlung. Daher ist die Frontplatte etwas anders. Außerdem habe ich eine SFU 1204 Kugelumlaufspindeleinstellung vorgenommen und Nema 23 für die Z-Achse installiert.
Alles auf Thingivese zu finden.
https://www.thingiverse.com/thing:4583991
https://www.thingiverse.com/thing:4588910
https://www.thingiverse.com/thing:4595595
https://www.thingiverse.com/thing:4628434
https://ibb.co/z4Xf580
Actually I knew that you are using Estlcam but I thought it was a GRBL software like. But I see that Estlcam uploads his own firmware on Arduino UNO using GRBL.
No worries, I will ask on another thread in order to not polute yours or maybe I will switch on Estlcam directly (I like the gamepad)
Don't be disappointed, the all family and I watch your videos every evening. Am I exaggerating ? just a little 😎
Thanks
Hello, Kamil
Your job is extraordinary! I will venture to perform the Heavy CNC with your update. Would you give me the link to your entire project?... Thank you.
My email address is: isahdezsilva@gmail.com
Hello Kamil,
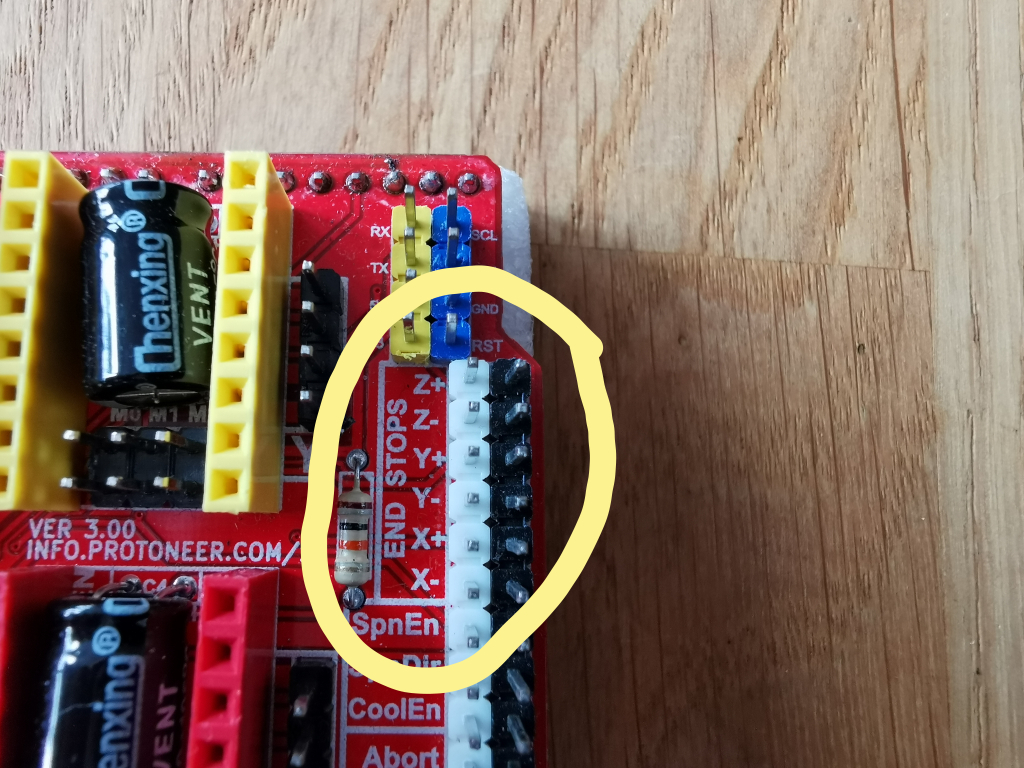
One more question for you regarding the optical endstops, how did you wire the (VCC, Gnd & Signal) onto the CNC shield?
Thank you
Ready
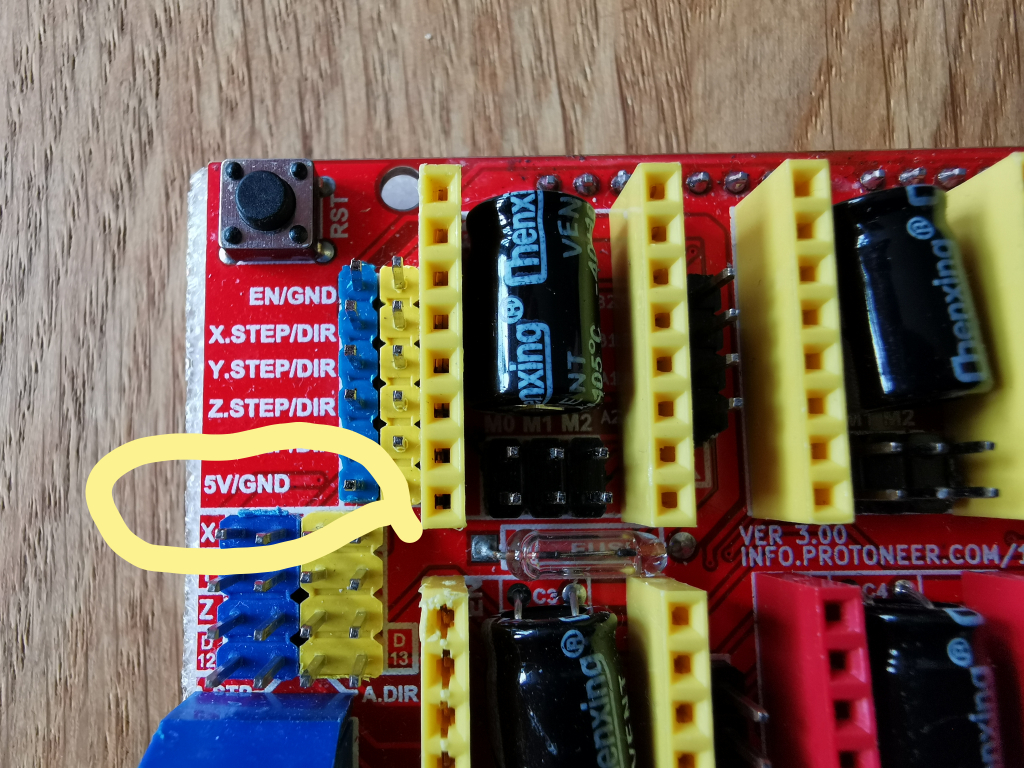
On the black and white bar on the right side of the shield, the upper ones are reserved for endstops. There you connect signal to white and GRD to black. VCC is 5V, you take the left top blue / yellow bar lowest pin (blue) is 5v on it.
Keep in mind that only three axes are controlled, they are not divided into X 1 and X2 or Y1 and Y2, but only X Y and Z. So you can save a lot of cables.
Thank you for this clarification Kamil.
Do I understand you right that only one signal of one endstop is connected to the shield per each axis but the second endstop of the same axis can be connected directly in parallel to the first one and do not need to go to the shield?
Exactly that. You can take 1x GRD, 1x 5v for all axes and 1x signal per axis. If I had thought about this before, I could have saved many cables.
And do not forget. You also need mass GRD for tool length measurement.
Hi Kamil,
I have a question. I currently would like to add the linear bearings to my Nema17 build but keep the indirect z-axis drive.
I have been comparing your design to the Nema17 Long Z Axis version from Topsie's design and my conclusion is that I can simply print your front parts and change them without needing to print the top part and without needing to print the back parts. Is this correct?
Thank you for your response and thank you for your design!